Transforming your concrete patio into a vibrant, inviting space isn’t as intimidating as it seems. First, you’ll need to gather all the necessary materials, including high-quality concrete paint, primer, and suitable tools.
Once you’ve got everything, it’s important to prepare the surface properly by cleaning and repairing any cracks or imperfections. This groundwork guarantees that the paint adheres well and lasts longer.
But the real secret to a professional finish lies in the next steps, where precision and patience play pivotal roles. Ready to enhance your patio game? Let’s delve into the process and maximize the full potential of your outdoor space.
Gather Your Materials
Before you start painting, gather all the necessary materials like concrete paint, primer, brushes, filler, and patio cleaner. Making sure you have everything on hand will save time and make the process smoother.
First, select a high-quality patio paint designed specifically for concrete surfaces. This type of paint will provide better adhesion and durability.
Next, you’ll need a good primer to help the paint stick to the concrete. Primers are important as they create a stable base for the paint.
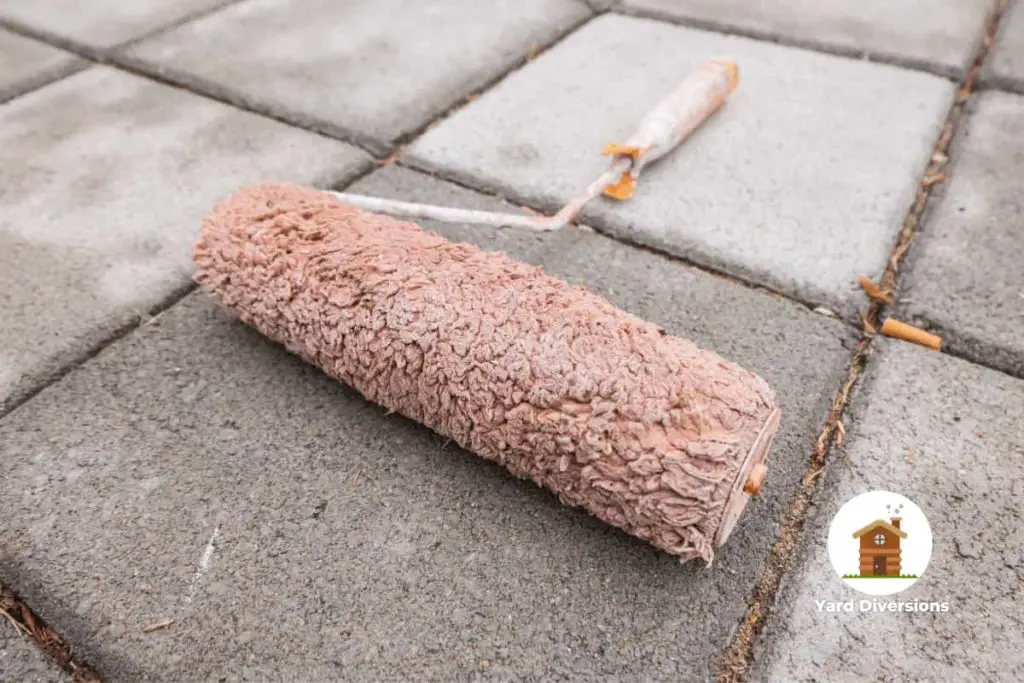
You should also have a variety of paint brushes and rollers to cover different areas efficiently. Brushes are great for corners and edges, while rollers can cover larger surfaces quickly.
Don’t forget the filler, which is essential for repairing any cracks or holes in the concrete. Before you start painting, using a filler will ensure a smooth and even surface.
Additionally, patio cleaner is necessary to remove any dirt or stains from the patio.
Protective gear like gloves and goggles is important for your safety. Sandpaper is also useful for smoothing out rough areas before painting.
Clean the Surface
With your materials ready, the first step is to thoroughly clean the surface of your concrete patio. Start by clearing any furniture, debris, and plants from the patio. To properly clean the surface, you can use a pressure washer or a mixture of water and detergent. This will help remove dirt, grime, and mildew from the concrete.
Next, scrub the surface with a stiff brush to guarantee thorough cleaning and to eliminate any stubborn stains. Pay close attention to all areas, especially those with visible dirt. Below is a handy table to guide you through the cleaning process:
| Step | Description |
|---|---|
| Clear the area | Remove furniture, debris, and plants |
| Use a pressure washer | Clean the surface with water and detergent |
| Scrub with stiff brush | Remove stubborn stains |
| Inspect for damage | Look for cracks and damage |
| Allow patio to dry | Make sure the patio is completely dry |
After cleaning, examine the patio for any cracks or damage. While the next subtopic will cover patching and repairing, it’s crucial to observe any issues now. Let the patio dry completely before moving on to the painting process. This ensures proper adhesion and a long-lasting finish, setting the stage for a successful project.
Patch and Repair
To guarantee your paint job looks professional, start by identifying any cracks or holes in the concrete patio. Choose suitable materials like concrete filler to address these problem areas.
Apply the patch correctly, making sure it’s fully dry and cured before moving on to the next step.
Identify Problem Areas
Start by inspecting your concrete patio for cracks, chips, and other imperfections that need patching and repair. Carefully examine the entire surface to identify problem areas that could affect the final outcome of your painting project. It’s important to address these issues to guarantee a smooth and even finish.
Once you’ve identified the problem areas, use a concrete patching compound to fill in any cracks or holes. This compound is specifically designed for repairing concrete surfaces and will help to restore the integrity of your patio. Apply the compound using a trowel or putty knife, making sure you smooth out the patched areas to create a level surface. Take your time with this step, as any unevenness can become more noticeable once the patio is painted.
After applying the patching compound, allow the patched areas to dry completely. This step is vital because painting over wet patches can lead to peeling or other issues down the line. Proper drying ensures that the repair is solid and ready for the painting process.
Choose Suitable Materials
When tackling the patch and repair stage, selecting the right materials is essential for guaranteeing a durable and seamless finish. Start by identifying suitable concrete patching compounds to fill any cracks or holes in your concrete patio. These compounds will help create a smooth surface for painting.
Repairing damaged or uneven areas is paramount, as a level surface ensures better paint adhesion and a professional appearance.
Address any spalling or flaking concrete by removing all loose particles before you begin painting. This step is critical to prevent future peeling or bubbling of the paint.
For areas stained with oil or grease, use a concrete degreaser to thoroughly clean the surface. This will ensure that the paint adheres properly and doesn’t peel off over time.
Proper surface preparation also involves filling in any divots or depressions. By doing so, you’ll create an even painting surface, which is essential for a uniform finish.
Selecting the right materials for these tasks not only improves the longevity of the paint job but also enhances the overall aesthetic of your patio.
Apply Patch Correctly
Begin by using concrete caulk to fill any cracks or holes in the patio surface, guaranteeing a solid foundation for the paint. First, clean the area around the cracks to remove any debris or loose concrete. Once cleaned, apply the concrete caulk directly into the cracks, making sure to fill them completely. Use a trowel or putty knife to smooth out the caulk, guaranteeing it blends seamlessly with the surrounding surface.
After applying the concrete caulk, you’ll need to allow it to dry completely. The drying time can vary depending on the product, so check the manufacturer’s instructions for precise details. Properly curing the patch material is crucial for achieving a seamless finish and ensuring the paint adheres well.
Once the caulk has dried, inspect the patched areas to make sure they’re smooth and level. If necessary, use the trowel or putty knife again to make any final adjustments. The goal is to achieve a smooth, even surface that blends with the rest of the patio. This careful attention to detail will pay off by providing a flawless base for your paint, guaranteeing a professional-looking result.
Apply Primer
Applying a quality primer to your concrete patio is crucial for a long-lasting and professional-looking paint job. The primer improves adhesion and durability of the paint on the concrete surface. It creates a smooth base, guaranteeing the paint adheres properly and looks flawless. You need to choose a primer specifically designed for concrete surfaces to guarantee proper bonding.
The primer helps seal the surface, preventing moisture penetration and enhancing the longevity of the paint job. By doing so, it protects the concrete from outdoor elements and foot traffic, which can cause wear and tear. Properly applying primer before painting can make a significant difference in how well the paint holds up over time.
Here’s a quick reference table to help you understand the benefits of using primer:
| Benefit | Description | Importance |
|---|---|---|
| Adhesion | Improves how well the paint sticks to the concrete surface | Ensures lasting paint |
| Durability | Increases the paint’s ability to withstand wear and tear | Extends paint life |
| Moisture Protection | Seals the surface to prevent moisture penetration | Prevents damage |
Make sure the concrete surface is clean and dry before applying the primer. Follow the manufacturer’s instructions for application and drying times to achieve the best results.
Paint the Patio
When painting the patio, it’s essential to choose quality paint specifically designed for concrete surfaces. Use proper application techniques, starting with a paint brush for edges and a roller for larger areas, applying thin, even coats.
Allow each coat to dry completely to guarantee a smooth, durable finish.
Choose Quality Paint
Selecting a high-quality concrete paint specifically designed for outdoor use is vital to ensuring your patio looks great and lasts for years. When you choose quality paint, you guarantee durability and longevity. Look for paint that offers resistance to UV rays, moisture, and foot traffic to keep your patio looking fresh. The right paint will also have a good color range, allowing you to match your desired design aesthetic and outdoor decor.
Additionally, it’s essential to pick a paint that provides good coverage and adhesion to the concrete surface. This ensures a professional finish and reduces the need for multiple coats. Opting for a paint that’s easy to clean and maintain will also make your life easier, especially given the varying weather conditions that outdoor spaces endure.
Here are some key features to look for:
- Durability: Ensures the paint withstands wear and tear over time.
- Resistance to UV rays: Protects the color from fading due to sunlight.
- Good coverage and adhesion: Provides a smooth, even finish with fewer coats.
- Easy to clean: Makes maintenance straightforward, essential for outdoor environments.
Proper Application Techniques
To achieve a professional-looking paint job on your concrete patio, always start by applying a high-quality concrete paint primer. This primer will guarantee a smooth and even application of the paint, aiding the paint in adhering better to the patio surface.
Once the primer is dry, use a high-quality roller to apply the paint. A good roller will provide consistent coverage, reducing the likelihood of streaks and uneven patches. It’s important to paint concrete in thin, even coats. This technique helps prevent drips and streaks, ensuring a cleaner finish.
Allow each coat to dry completely before applying the next one. Patience is key here; rushing through this step can compromise the final look. Depending on the type of paint you’re using, drying times can vary, so follow the manufacturer’s instructions.
For enhanced vibrancy and durability, consider applying a second coat of paint. This additional layer won’t only make the color pop but also offer extra protection against the elements.
Seal the Surface
Applying a high-quality sealer to your concrete patio is crucial for protecting it from moisture, stains, and daily wear. Sealing the surface creates a durable finish that not only enhances the color and appearance of your patio but also extends its lifespan. By preventing cracks and other damage, a sealer keeps your concrete patio looking new and functional for years to come.
Here’s how you can effectively seal your concrete patio:
- Choose the Right Sealer: Select a sealer specifically designed for exterior concrete surfaces to guarantee excellent results.
- Clean Thoroughly: Before applying the sealer, make sure the surface is clean and dry. Remove any dirt, debris, or previous coatings.
- Apply Evenly: Use a roller or sprayer to apply the sealer evenly across the surface, ensuring all areas are covered.
- Reapply Regularly: To maintain protection and appearance, reapply the sealer every 1-3 years, depending on the wear and tear your patio experiences.
Conclusion
By following these steps, you’ll achieve a professional finish on your concrete patio.
Start by gathering all necessary materials, then clean and repair the surface.
Apply a primer to guarantee good adhesion, followed by even, thin coats of paint.
Finally, seal the surface to protect your work.
Regular maintenance, including reapplying the sealer every 1-3 years, will keep your patio looking great.
Stick to this guide, and your patio will be both durable and attractive.
